Understanding Mooswand für Zuhause
1. What is a Moss Wall?
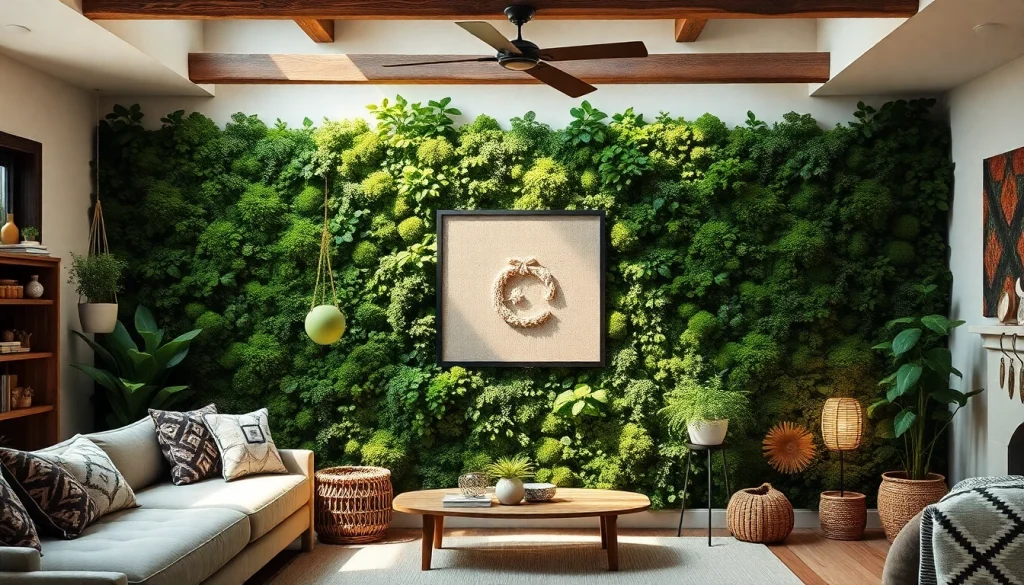
A moss wall is a decorative installation that primarily utilizes preserved or live moss to create stunning and lush vertical gardens. These walls can be incorporated into residential or commercial spaces, offering a unique way to blend nature with interior design. The use of moss provides an organic texture and an earthy feel, often evoking tranquility and a sense of well-being. Unlike traditional artwork, moss walls not only beautify a space but can also offer benefits such as improved air quality and sound insulation.
2. Benefits of Mooswand für Zuhause
Integrating a Mooswand für Zuhause provides multiple advantages. Firstly, these walls are beneficial for both aesthetic and health reasons. They can enhance indoor air quality by acting as natural air filters, absorbing pollutants, and releasing oxygen. Furthermore, moss possesses sound-absorbing properties, making it a practical choice for reducing noise levels in busy environments.
Additionally, moss walls require minimal maintenance compared to other plants, as they do not need soil, watering or direct sunlight. They infuse a unique biophilic design element into any setting, aligning with the rising trend of incorporating natural elements into modern architecture.
3. Ideal Placement for Moss Walls
When considering the placement of a moss wall, it’s vital to take the space’s lighting and humidity into account. Ideal locations include:
- Living Rooms: They serve as stunning focal points in open-plan designs.
- Offices: Moss walls can create a calming environment that may enhance productivity.
- Bathrooms: The humid environment can provide a sustainable habitat for live moss, promoting fresh scents.
- Entrance Halls: A moss wall can provide a striking welcome that leaves a lasting impression.
Types of Mooswand für Zuhause
1. Preserved vs. Live Moss Options
Choosing between preserved and live moss is crucial when setting up a moss wall. Preserved moss is treated with glycerin and other compounds to maintain its color and texture without the need for sunlight or frequent maintenance. It’s the ideal choice for those who may not have the time or conditions to care for live plants.
On the other hand, live moss offers a dynamic element to the space and can continue to grow over time, providing a truly organic experience. However, it requires specific conditions including indirect sunlight and regular watering, which can make it a less convenient option for some homeowners.
2. Creative Designs and Styles
The creativity that can go into designing a moss wall is limitless. Some popular styles include:
- Abstract Patterns: Use various shades of green to create modern, artistic representations.
- Living Landscapes: Incorporate other plants, stones, or wood to mimic a natural environment.
- Lettering or Logos: Companies often use moss walls to display branding in a creative, eco-friendly manner.
When designing your moss wall, consider the overall aesthetic of your space and choose shapes and colors that compliment your existing decor.
3. Choosing the Right Type for Your Space
Selecting the appropriate type of moss wall for your environment can greatly impact your satisfaction with the final result. Factors to consider include:
- Lighting Conditions: If the area has sufficient indirect light, live moss may thrive; otherwise, preserved moss is preferable.
- Humidity Levels: Spaces with higher humidity can support live moss better than dry areas.
- Aesthetic Goals: Define whether you are seeking an artistic expression, a calming nature element, or even a functional feature like sound dampening.
Installing a Mooswand für Zuhause
1. Tools and Materials Needed
Installing a moss wall requires several tools and materials to ensure a professional finish. Prepare the following before beginning the installation:
- Moss (preserved or live)
- Sturdy backing material (such as plywood or a specialized frame)
- Adhesive suited for the chosen moss type
- Utility knife for cutting and shaping
- Measuring tape for accurate size specifications
- Spray bottle with water (if installing live moss)
2. Step-by-Step Installation Guide
Follow these steps for an effective moss wall installation:
- Choose and Prepare the Surface: Select a wall or area that receives adequate indirect light. Clean and dry the surface to ensure proper adhesion.
- Measure and Cut the Backing Material: Cut your plywood or frame to the desired size for your moss wall. Ensure it’s an appropriate size for both the space and moss type.
- Apply the Adhesive: Use a strong adhesive to coat the backing. Ensure an even layer for proper attachment.
- Place the Moss: Begin applying the moss, starting from one corner and pressing gently into place. If using live moss, make sure to mist it regularly during this process.
- Finishing Touches: Make adjustments as needed to ensure a natural look and feel, ensuring all areas are adequately covered.
3. Tips for a Professional Finish
To achieve a polished look, consider the following tips:
- Layering: Layer moss varieties for depth and visual interest.
- Mix Textures: Introduce additional elements like stones or driftwood for added contrast.
- Regular Maintenance: Check for areas that might need reattaching or replacing over time.
Caring for Your Mooswand für Zuhause
1. Maintenance Tips for Longevity
To ensure the longevity of your moss wall, maintenance will vary depending on whether you choose preserved or live moss. For preserved moss, simply dust it occasionally with a soft cloth and avoid placing it in direct sunlight, which may fade its color. For live moss, ensure it has sufficient moisture, misting it regularly, and occasionally checking for mold growth.
2. Common Issues and Solutions
Be aware of common problems that can arise, particularly with live moss:
- Mold Growth: If this occurs, lessen the humidity and improve ventilation surrounding the wall.
- Color Fading: Ensure it remains out of direct sunlight to prevent this issue.
- Drying Out: For live moss, maintain a regular misting schedule based on the ambient humidity levels.
3. Enhancing Sustainability in Care
Embrace sustainable practices when caring for your moss wall. Opt for organic products when applying any treatments, and consider using rainwater for misting live moss. This not only nurtures the plants with natural resources but also minimizes environmental impact.
Inspiration and Ideas for Mooswand für Zuhause
1. Stylish Combinations with Other Decor Elements
Creating a cohesive look with your moss wall can enhance your room’s overall aesthetic. Combine your moss wall with:
- Wooden Accents: Using wooden frames or shelves can draw attention to the natural qualities of moss.
- Metallic Elements: Modernize your space by pairing moss walls with metallic decor for a striking visual contrast.
- Boost Natural Light: Strategically placed mirrors near the moss wall can increase perception of space and light.
2. Transforming Different Rooms with Moss Walls
Utilizing moss walls in various settings can transform the atmosphere significantly:
- Bedrooms: Create a calming oasis by installing moss in calming shades near the sleeping area.
- Kitchens: Use a moss wall as a vibrant backdrop to cooking areas, invigorating the space.
- Outdoor Spaces: Pair your indoor moss wall aesthetic with sunset hues to create continued design themes across environments.
3. Seasonal Decoration Ideas
Refreshing your moss wall with seasonal themes can breathe new life into your decor. Consider:
- Spring Audits: Add blooms or lighter colors to reflect renewal and growth.
- Summer Vibes: Incorporate sun-themed decor, like yellow or vibrant floral accents.
- Autumnal Touches: Use earthy tones and include dried leaves or influences from fall harvests.
- Winter Whimsy: Seasonal elements like pinecones or fairy lights can give a cozy effect during colder months.